The lights went up on the street last week, you took the camera out after dinner, and what came back was a card full of orange smudges with a bright blob where the tree was. Nothing is in focus, or everything is, and either way it looks nothing like the thing you were standing in front of.
Search christmas lights photography settings and the first chart you find will tell you ISO 100, f/8 and a tripod. That advice is not wrong. It is answering a different question from the one you asked, and the gap between the two is where every disappointing holiday photograph lives.
Where ISO 100 comes from, and why Nikon's own number is ISO 5600
Here is the contradiction, straight out of the camera maker's own material.
Nikon publishes a guide to the classic holiday light bokeh effect, written by Lindsay Silverman, and it prints the exposure under each sample picture. The bokeh shot of a light display is credited at 1/80 of a second, f/4, ISO 5600, in aperture priority. A second frame, focused on a subject in the foreground with the lights behind it softly out of focus, is 1/80 at f/4 and ISO 4500. A third, a Santa figurine lit by ambient room light rather than the bulbs themselves, is 1/20 at f/5.7 and ISO 640.
Fifty six hundred, from Nikon, for the picture everyone is trying to take. So why does every chart say one hundred?
Because the two are answering different questions. ISO 100 assumes the camera is bolted to something and the shutter can stay open as long as it likes. Nikon's own holiday display article says as much when it tells you to increase the ISO so you can use the shutter speed and aperture combination you want. The tripod chart is a long exposure recipe. You are standing on a sidewalk in the cold, holding the camera in two hands, and a two second exposure is not available to you at any ISO.
Start from how you are actually standing, not from the lowest number the sensor can do.
Three sets of christmas lights photography settings, not one
The scene splits into three situations and they want genuinely different exposures. These are starting points to dial in from, with Nikon's published figures where they exist and our reasoning where they do not.
| Situation | Start here | Why |
|---|---|---|
| Display, camera on a tripod | Aperture priority, f/8, ISO 100 to 400, let the shutter land where it lands. Image stabilization off. | Nothing is moving and neither are you, so buy depth of field and a clean file with time instead of ISO. Nikon says to leave VR turned off when the camera is on a tripod. |
| Display, handheld | Aperture priority, lens wide open at f/4 or wider, Auto ISO with a minimum shutter speed of 1/80, and accept four figures of ISO. | This is Nikon's own sample frame: 1/80, f/4, ISO 5600. The shutter speed is the thing you cannot negotiate, so ISO is the slider that has to move. |
| Someone standing in front of the lights | f/2.8 to f/4, minimum shutter 1/125, subject close to the camera with the lights well behind them. | A person breathes, shifts weight and blinks, so 1/80 is not enough. Nikon's guidance is to put the subject near the camera with distance between them and the bulbs, which is what turns the lights into circles rather than clutter. |
If Auto ISO with a floor on the shutter speed is not something you have set up, that is the single most useful control on the camera for this and we wrote it up on its own in Auto ISO and the minimum shutter speed. Set the floor, forget the ISO, and the camera stops handing you blurred frames in the dark.
High ISO is not the failure here
People look at ISO 5600 and flinch. Look at what the picture is made of instead. A holiday lights frame is mostly dark with small, very bright points in it, and noise lives in shadows that you are not going to brighten. The grain is in the parts of the frame nobody looks at. A sharp noisy photograph of a light display beats a clean blurred one every single time, and the blurred one is what ISO 100 handheld actually produces.
The instruction almost nobody includes: turn autofocus off
This is the step that separates the picture you want from the picture you keep taking.
Nikon states it directly: the secret to the soft colorful globes of light is to manually focus so the lights are out of focus, and to turn autofocus off so the camera stops trying to grab them while you work. Its reminder to switch it back on afterwards is in there too, which tells you how often that gets forgotten.
So the sequence is deliberate. Switch the lens or the camera to manual focus. Open the aperture as wide as it goes, which Nikon puts at f/4 or wider, with f/2.8, f/1.8, f/1.4 or f/1.2 lenses called ideal. Then turn the focus ring away from the lights and watch the bulbs swell into discs in the viewfinder. Stop where the discs look right to you rather than at any particular distance mark.
The size of those circles is set by two things: how far out of focus you go, and how wide the aperture is. The shape of them is set by your lens, which is why the same display looks different through a fast prime than through a kit zoom. There is no setting for this. You turn the ring until it looks good.
Lights behind a subject
Same trick, one change. Autofocus goes back on and focuses on the face or the object, and the lights fall out of focus on their own because they are far behind it. Nikon's advice on placement is worth repeating: the further back the lights, the softer and glowier they go, and the closer they are, the more you can see the shape of each bulb. Walk your subject two steps forward and the whole background changes.
Go out at dusk, and leave the flash alone
Two more things from Nikon's holiday display guide that cost nothing and change a lot.
Shoot at dusk rather than waiting for full dark. Nikon's reason is that it keeps some of the background visible and exposed, which is the difference between a tree in a garden and a tree floating in a black rectangle. That window is short. Twenty minutes after the street lights come on is roughly the whole thing.
Do not use the flash on a display made of lights. Nikon is blunt about this: the flash washes out the color of the bulbs. The one exception it allows is fill flash on something that is lit but not itself a light, like a statue in the middle of the display.
White balance is worth playing with rather than leaving on auto, especially on older strands. Nikon points at the tungsten preset for those, because the warm bulbs push everything orange and auto white balance tends to split the difference and get neither the lights nor the snow right. If white balance is a setting you have been ignoring, we went through the presets and what each one is for in the white balance guide.
One more, for a different picture
Point the camera into small bright pinpoints at a small aperture, f/16 or f/22, and Nikon says those lights turn into starbursts. It is the opposite of the bokeh setting in every respect and it is the reason to stay out for an extra ten minutes once you have the soft frames in the bag.
Standing still in the cold, with the camera on you
Manual focus in the dark is a two handed job, and you will be doing it over and over while your hands get colder. The camera ends up being picked up and put down fifty times in an hour, which is the part of the evening nobody plans for.

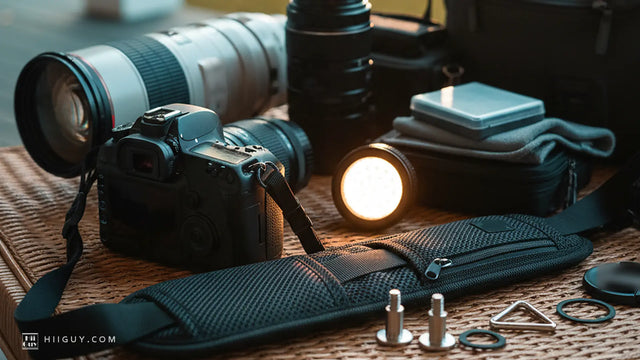
That is the position you want between frames: the camera hanging where your hand falls on it, not pushed round your back and not swinging off your neck. The HiiGuy strap is heavy-duty polyester webbing with a wide padded shoulder pad, a stainless steel quick release and a safety tether, and the detail that matters in December is the adjustment range, because a strap set over a t-shirt in September has nothing left to give over a parka. There are two variations and length is the only difference: the Regular adjusts up to 32 in on the body, the XXL up to 44 in. Everything else is the same in both. We have made these in Los Angeles since 2016 and back the HiiGuy strap for three full years. It is on Amazon here.
The order to do it in
Five steps, in this sequence, and the evening works.
- Go out at dusk, not at nine o'clock.
- Flash off. Image stabilization off if you are on a tripod, on if you are not.
- Aperture priority, lens wide open, Auto ISO with the shutter floor at 1/80 handheld or 1/125 if a person is in the frame.
- For the bokeh frames, manual focus on, autofocus off, turn the ring until the discs look right.
- Before you leave, drop to f/16 and shoot the same lights again for the starbursts.
If you want the same treatment for the rest of the year, our settings by scenario chart covers the other situations that catch people out, and the autumn settings piece is the one that precedes this season.
The short version: ISO 100 is a tripod answer. If you are holding the camera, Nikon's own frames say the number you need is a lot bigger than that, and the picture will be better for it.