You have the camera in one hand, a loose strap in the other, and a diagram in the box that clearly made sense to whoever drew it. The webbing goes through the little metal loop, that much is obvious. What happens after that is where people stall, and it is why so many photographers end up searching for a camera strap hook instead of threading strap webbing through a buckle at all.
Both routes work. One of them is free and takes ninety seconds. The other costs money and buys you something real. Here is the threading, in order, with the step that gets skipped, and then an honest look at the hardware that replaces it.
What the buckle is actually doing
Understand this one part and the rest is obvious.
The small rectangular slider on a camera strap is a friction lock. It has a bar across the middle, and the webbing goes over that bar, round it, and back under itself. Nothing grips. Nothing clamps. The strap holds because the loaded side of the webbing presses the loose tail against the bar, and the harder you pull, the harder it presses.
That is the whole mechanism, and it has one consequence worth knowing before you start: a slider that is not carrying load has almost no grip at all. A strap you threaded loosely will sit there looking fine on the table and pay out the moment there is a camera on it. Tension is not a finishing touch. It is the thing doing the work.
Threading a camera strap through the lugs, in order
Do one side completely before you touch the other. Half-threading both ends at once is how people lose track of which way the webbing was facing.
1. Free the tail
Pull the loose end back out of the slider until you have eight or ten inches of spare webbing to work with. Fighting a two-inch tail with your fingernails is the single biggest reason this job feels harder than it is.
2. Through the lug, from underneath
Canon's own instruction manual for the Rebel T7 is unusually blunt about the direction: pass the end of the strap through the camera's strap mount eyelet from the bottom, then pass it through the strap's buckle, then pull out any slack and make sure the strap will not loosen from the buckle. Three sentences, and the first one matters. Going up through the lug means the finished tail ends up lying flat against the strap rather than sticking out sideways into your jaw.
Nikon's manuals say the same thing in fewer words and add the part Canon leaves implied: attach it to both eyelets, and do not let the webbing twist on the way.
3. Check for a twist before you go any further
Run your thumb and finger along the webbing from the pad to the lug. If it rolls over anywhere, unthread it and start again. A twisted strap does not fail, it just sits wrong on your shoulder forever, and you will spend a year quietly blaming the pad.
4. Back through the slider, the right side of the bar
The tail comes back into the slider it originally came out of, and it goes in on the same side as the main length of webbing, so the two layers end up sandwiched together against the bar. If your tail is riding on the outside of the slider with the loaded webbing underneath, it is threaded backwards. It will hold for a while. It will also creep.
5. The step everyone skips
Take the tail and feed it back under the second bar of the slider, the one nearest the camera, so the loose end is captured rather than hanging free.
This is the step that separates a strap that holds its length from one you find yourself readjusting every hour. Most sliders have two bars for exactly this reason. Most people use one, because with only a couple of inches of tail left there is nothing to feed back through, which is why step one was to pull ten inches out.
6. Pull it tight while it is loaded
Hang the camera off the strap at waist height and pull the loose end hard, with the weight on it. Tightening a slider on a slack strap sets it at the wrong tension and it will take up the difference the first time you walk.
The two-minute test that tells you it is right
Three checks, and then you can stop thinking about it.
Hold the strap just above the slider and pull down on the camera with real force. Not a polite tug. The kind of yank you would give if the camera slipped. If the webbing moves even a quarter of an inch through the slider, it is going to keep moving.
Look at the lug. The webbing should sit flat in the metal loop and not bunch in the corner of it. If it is wadded up against one side, you have too much strap going through too small a fitting, and on a narrow lug that is what saws through a strap over years.
Then hang it on your shoulder and walk twenty steps. That is the check nobody does and the only one that catches a twist.
Wanting a camera strap hook instead of threading strap webbing at all
This is a real search, people type it every month, and it is a fair question rather than laziness. Threading is fiddly, and if you move one strap between two bodies you are doing it constantly.
There are three hardware answers, and they are not equal.
Split rings. The keyring that came in the box with a lot of cameras. The ring goes on the lug, the strap clips to the ring. It works, and it is the cheapest route. It is also the part of the system that fails quietly: a split ring opens into a spiral if you snag it often enough, and you will not notice until something slides off it.
Cord anchors. Small loops of cord that thread once through the lug and stay there, with a plastic head that clicks into a matching socket on the strap. Peak Design's anchors are the ones most people mean, and the company publishes a figure of over 200 pounds per anchor, which is not the number that should worry you. The cord passing through the metal lug is the wear point, and it is a consumable.
Swivel snap hooks. A metal clip on the end of the strap that hooks onto a ring or a mount on the camera. This is what most sling and crossbody straps use, and it is the reason a sling strap comes off in one motion.
What all three have in common is that you still thread something, once, and then you never do it again. That is the actual promise, and it is a good one.
Thread it once: how the HiiGuy strap handles this

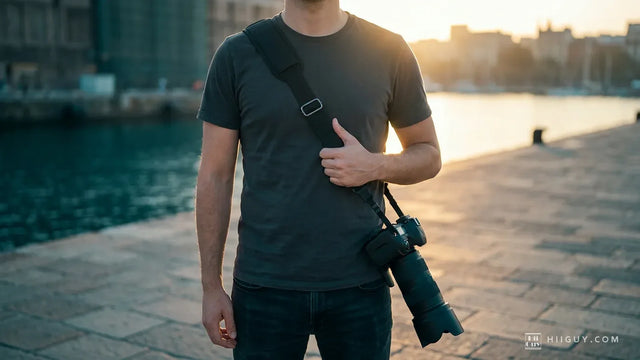
That is one of our own photographs, and the slider this whole article is about is the small black rectangle sitting on the webbing at chest height. It is what sets the length, and it is the only part you ever thread.
The HiiGuy strap attaches with a stainless steel quick release rather than by threading into the lugs, so the camera end of the job is a clip. The screw mount goes into the tripod socket once and stays there, the safety tether clips to an eyelet as a second route for the load, and a spare mount comes in the box so a second body is another clip rather than another threading session. We went through what that release is and is not doing in our piece on quick releases, and the choice between the socket and the lugs in tripod socket or strap lugs.
The rest is unglamorous on purpose: heavy-duty polyester webbing, a wide padded shoulder pad, rustproof metal fittings. HiiGuy has been making these in Los Angeles since 2016 and backs the HiiGuy strap for three full years.
It comes in two variations and the only difference between them is how far they adjust. The Regular adjusts up to 32 inches on the body, the XXL up to 44 inches. That is the number that decides whether the camera lands at your hip where you can reach it or up under your ribs where you cannot.
If your strap screws into the base instead
Sling and crossbody straps mostly skip the lugs entirely and screw a fitting into the tripod socket. There is no threading to get wrong, but there is a different check, and it is the one people forget.
A screw in a single thread can rotate, and a camera on a strap rotates constantly. Nip the fitting finger tight and make sure there is something soft under the head of it, a rubber or fibre washer, because bare metal against a metal base plate has very little friction and walks loose over weeks. Then clip the safety tether to an eyelet, since a tether on the same fitting it is meant to back up is decoration. That argument is laid out properly in why a strap needs a safety tether.
The short version
Pull ten inches of tail out first. Up through the lug from underneath. Check for a twist. Back into the slider on the same side as the loaded webbing, then back under the second bar so the tail is captured. Tighten it with the camera hanging on it, not on the table.
Then pull down on the camera hard, once. If nothing moves, you are done, and you will not have to think about it again until you buy another body.