You photographed the thing on the kitchen counter, uploaded it, and then scrolled past the listing directly above yours. Same item, roughly the same condition, and theirs looks like it belongs in a shop while yours looks like evidence. Grey, flat, slightly green, with a shadow of your own arm across one corner.
Here is the annoying part: the gap between those two photographs is almost never the camera. Product photography at home gets treated as an equipment problem because equipment is the part you can buy, and the people who are good at it will tell you, every time, that they fixed the light before they touched a dial. If you own a DSLR and a kitchen table you already own enough. What you are missing is an order of operations.
Light first, camera last
The reason your photo looks flat is that the light hitting your item is coming from directly above it, from a ceiling fixture, and from directly in front of it, from the camera's own flash. Light from the front kills shadow, and shadow is the only thing in a photograph that tells the eye an object has a shape. Remove it and you get a sticker.
Donna Crous, in Nikon's own guide to food photography at home, puts the rule bluntly: food is almost always shot with directional light, from the side or from behind, and shooting it straight on makes it lack depth and dimension. She is talking about a bowl of berries, but a pair of boots, a vintage radio or a knitted hat is the same physics. You want the light coming across the object, not at it.
Find the window with an egg
Crous describes a test that is almost too simple to believe, and it works. Take an egg, walk it around to each window in your home, and stand it side on to the glass. You are looking for a soft, feathered shadow that starts bright near the window and falls away gradually into shade. The window that does that to an egg is the window that will do it to whatever you are selling. Soft, filtered light is what you want, which in practice means an overcast day, a north-facing window, or a thin white curtain between the glass and your subject.
Direct midday sun through clear glass is the one thing to avoid. It is the same hard light that makes people squint in holiday photographs, and on a glossy object it produces a white blown-out streak that no amount of editing recovers.
Bounce the other side
Light from one side gives you shape. Too much of it gives you a black hole where half the item used to be. The fix costs nothing. Crous recommends putting a reflector on the opposite side of the subject, and says a piece of tinfoil or a white card does the job if you do not own a proper panel. A sheet of white printer paper propped against a mug works. Move it closer to lift the shadows, further away to deepen them, and watch what happens on the screen rather than guessing.
Turn the ceiling light off
This feels wrong and it is the single biggest improvement most people make. Household bulbs are a different colour from daylight, so leaving them on while you shoot by a window mixes two colours of light in one frame. The result is an item that is warm on one side and cool on the other and will not correct cleanly afterwards. One light source, one colour, every time.
The surface matters more than the backdrop
Most advice tells you to buy a white sweep. Most of the time you do not need one, and a bad surface will ruin a shot faster than a plain background will save it.
Crous's list of surfaces worth using is worth stealing wholesale: wooden planks, newspaper, parchment paper, sheet music, wallpaper samples, ceramic tiles, and vinyl because it wipes clean. Her warning is the useful bit. Avoid pine tabletops, because they go very yellow and orange and end up overbearing, which is exactly the cast that makes a home-shot listing photo look home-shot. She also says keep props neutral so the item stands out, and to watch reflections on anything shiny, which is a real problem if you are selling cutlery, jewellery or anything chrome.
Two more of her composition rules transfer directly to a listing. Do not feel the need to fill the frame, because negative space is powerful, and group things in odd numbers when you are shooting more than one. Three of a thing photographs better than four.
Now, finally, the camera
The settings are the easy part once the light is sorted, and the goal is different from normal photography. You are not after a pretty blurred background. You are after an honest, sharp, correctly coloured record of an object, because a buyer who feels misled leaves a review about it.
Aperture: enough depth to hold the whole item
The instinct from portrait photography is to open the lens up and blur everything. Resist it for a listing. Crous recommends a wider aperture around f/3.5 when she wants a single hero element to stand out, but notes that for an overhead or flat lay shot where the whole image needs to be in focus, a smaller aperture starting around f/5.6 is ideal. For a product you are selling, that second case is almost always the one you are in. Start at f/5.6 and stop down further if the front and back of the item are not both sharp.
Shutter speed: the number that forces the tripod
Crous's handheld floor is 1/125 of a second, and anything slower risks camera shake and a soft frame. Here is the trap: closing the aperture down to f/8 indoors by a window will very often push you below that. The honest answer is not to raise the ISO until it works. The honest answer is a tripod, which lets you shoot at 1/15 or slower with no penalty at all, because the item on the table is not going anywhere. If the blur you are getting is motion rather than focus, we went through the three settings behind it in why your indoor photos come out blurry.
Put the camera on the self-timer once it is on a tripod, so your finger is not on the body when the shutter opens. Crous goes further and programs her camera to take ten frames per self-timer session, which is a genuinely good habit when you are moving a reflector between shots. Any steady support works. We listed some inexpensive ones in best budget tripods for travel photography, and the same legs that hold a camera still on a hillside hold it still on a kitchen floor.
ISO: as low as you can get away with
Crous's position is sensible rather than dogmatic. Lower ISO means less noise, so keep it as low as possible, but do not sacrifice your shutter speed for it if you are handheld. On a tripod that trade disappears and you can simply sit at your camera's base ISO, which is where the files are cleanest.
White balance and the mode dial
Colour is the thing buyers complain about. A navy jumper that photographs black gets returned. Crous's approach is to leave the camera on auto white balance and shoot RAW, because RAW leaves room to correct the colour afterwards in post-production. That works. The alternative, if you would rather get it right in camera and not edit at all, is to set the white balance deliberately for the light you are actually in, which we broke down preset by preset in what each white balance preset actually does.
If you have been shooting in full auto and some of this sounds like it is on a part of the dial you have never used, the mode dial, one row at a time is the place to start. Aperture priority is all you need here.
The lens
Crous's recommendation for shooting small things at home is a 50mm f/1.8, on the grounds that it is the go-to lens for the job and is reasonably priced. If you own one, use it. The kit zoom at its longer end will also do the job, and standing further back with a longer focal length is usually kinder to an object's proportions than filling the frame from a foot away with a wide angle.
What eBay and Etsy actually ask for
Both platforms publish their requirements, and both get guessed at far more often than they get read.
eBay's picture policy requires at least one photo that is 500 pixels on the longest side, and its help pages recommend images around 1600 by 1600, in a 1:1 or 16:9 ratio, with a 12 MB ceiling per file and up to 24 photos per listing. The prohibitions are stricter than most sellers realise. The policy bans added borders, added text, artwork or marketing material, and watermarks of any type, including ones used to claim ownership. eBay's own guidance adds that badges, logos and copyright notices can affect where your listing lands in search results. If you have been adding a tidy white frame and your shop name in the corner, that is actively costing you.
Etsy goes the other way on size. Its help pages recommend listing photos with a width and height of at least 2000 pixels, and warn that the first photo needs to be at least 635 pixels or the listing shows up lower in search. Etsy also says that the first photo should be horizontal or square, that files over 1 MB may not finish uploading on a slow connection, and that images are converted to sRGB, so exporting in sRGB yourself avoids a colour shift you did not ask for.
Read together, those two sets of numbers point at one export: a landscape or square JPEG, around 2000 pixels on the short side, sRGB, under a megabyte, with nothing added on top of the photograph.
Keeping the camera on you while you work

A photography session at home is mostly not photography. It is fetching the next item, moving a reflector, cutting a piece of card, and crouching to check an angle, with a camera in one hand the whole time. That is the frame above: both hands on the body, the strap hanging across the chest and staying out of the way until he stands up.
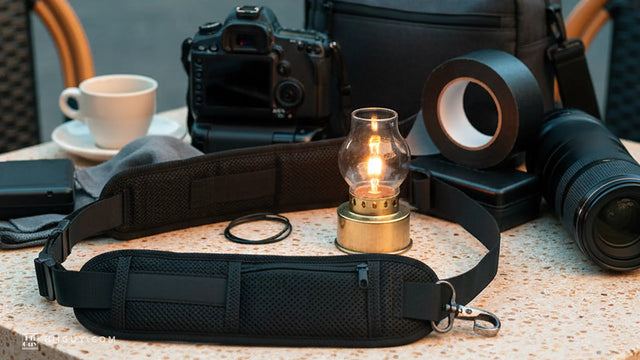
That is the only reason a strap belongs in an article about tabletop shooting. The HiiGuy strap uses a stainless steel quick release at the camera end, so the body comes off in a second when it goes on the tripod and clips back on when you pick it up again, and there is a safety tether on a separate fixing for the part of the day where you are walking around a hard floor with it. It carries a 3 year warranty from HiiGuy. It comes as two variations with length as the only difference, the regular adjusting up to 32 in on the body and the XXL up to 44 in, and both are options on one Amazon listing.
Build it once, leave it up
The last piece of advice is logistical rather than photographic. The reason home listing photos stay bad is that setting up takes twenty minutes and photographing one item takes two, so nobody does it until there are fifteen things in a pile and the light has gone.
Pick the window the egg chose. Leave a board or a tile on the table near it, leave a sheet of white card propped where the bounce goes, and leave the tripod set at the right height in a corner. Mark the tripod's spot on the floor with tape if you are inclined that way. Then photographing a new item costs four minutes instead of half an evening, and you will actually do it on the day the item arrives rather than three weeks later.
Shoot more frames than you need, from the angles a buyer would ask about: straight on, three quarters, the back, the label, and a tight one on any flaw. The honest photograph of the scratch is the one that stops the return.