You searched for the best camera settings for portraits, you got told that it depends on the light, and you closed the tab still not knowing what to put the dial on. The advice was not wrong. It was just useless to someone standing in a park with twenty minutes of good light and a friend who is already getting self-conscious.
So here are the numbers first. Then the reasoning, so you know which one to move when the picture is not working. A starting point you can change beats a principle you cannot act on.
Put these in, right now
One person, outdoors, in open shade or on an overcast day, DSLR with a kit zoom or a 50mm:
- Mode: Aperture Priority. A on a Nikon dial, Av on a Canon one.
- Aperture: f/2.8 if your lens opens that wide, f/4 if it does not.
- Focal length: the long end. If you are on an 18-55 kit lens, that means 55mm, and step back rather than zooming out.
- ISO: Auto, with the ceiling set to 3200 and the minimum shutter speed set to 1/160.
- Autofocus: single point, moved onto the eye nearer the camera, in the single-shot mode (AF-S on a Nikon, One-Shot AF on a Canon).
- Metering: leave it on the default evaluative or matrix setting, then use exposure compensation, usually around +2/3 on a pale face against a dark background.
- Drive: single frame to start with.
Two or three people standing in a loose group: same list, but f/5.6. That single change is the difference between a group portrait and a group portrait with one person soft, and the next section is the reason.
The aperture number is the whole argument
Everyone tells beginners to open the aperture wide for a blurry background. Almost nobody tells them how thin wide open actually is, and that gap is where most disappointing portraits come from.
Run the standard depth of field arithmetic for an APS-C sensor, using the usual 0.019 mm circle of confusion for that format, and a 50mm lens focused on someone standing 6 feet away gives you this:
- f/1.8 : about 3.5 inches in focus, front to back
- f/2.8 : about 5.5 inches
- f/4 : about 7.8 inches
- f/5.6 : about 11 inches
- f/8 : about 15.8 inches
Three and a half inches. A human head is about nine inches deep. If your subject turns even slightly away from the camera, the near eye and the far eye are not both in that slice, and if you focused on the nose then neither eye is. At 85mm and 8 feet, which is a classic portrait distance, f/1.8 gives you roughly 2.1 inches, and the number keeps shrinking the closer you stand.
This is why f/2.8 is a better default than f/1.8 even on a lens that can do f/1.8. You lose a small amount of background blur and you gain two inches of tolerance for your subject moving, your focus point drifting, and your own body swaying while you breathe. For two people side by side, who are almost never exactly the same distance away, f/5.6 is not timidity. It is arithmetic.
Shutter speed is about your subject, not your hands
The old rule is one over the focal length, and on a crop-sensor DSLR you multiply by the crop factor first, so a 50mm on a Nikon DX body behaves like 75mm and the rule says 1/80.
That rule is about camera shake. It has nothing to do with the person in front of you, and people are not still. Someone standing and talking moves their head constantly, shifts their weight, blinks. A relaxed standing adult needs about 1/160 before small movements stop softening the face. A child who has been asked to stand still needs 1/250, and a child who has not been asked needs 1/500.
The cleanest way to hold that floor is to let Auto ISO do it. Set the minimum shutter speed yourself rather than leaving it on auto, and the camera will raise ISO instead of letting the shutter drop. We went through how that setting behaves in Auto ISO, set properly, and it is the single setting that fixes more beginner portraits than any aperture advice.
Noise at ISO 3200 is a minor cosmetic problem. A soft face is not fixable at all.
Focus is the setting that actually decides the picture
Here is where most portrait advice on the internet is quietly wrong for DSLR owners, because it was written for mirrorless cameras.
Nikon's published specifications for the D7500 list 51 focus points, 15 of them cross-type, and then there is one line that matters more than all of them: Face-Priority AF is available in Live View only. The same split exists on Canon bodies, where the Rebel line's Eye Detection AF is a Live View feature. Your camera can find a face and an eye on its own. It cannot do it while you have your eye to the viewfinder, which is how you will actually be shooting.
So through the viewfinder, you choose the point. Move the active AF point onto the eye nearer the camera, rather than focusing centrally and recomposing, because at the depths listed above a recompose swings the focus plane off the face entirely.
Use the single-shot mode. Canon's own manual for the Rebel T8i describes One-Shot AF as suited for still subjects, and says the camera will focus only once when you half-press the shutter. That once is what you want, because it gives you a confirmed, locked focus you can see.
The continuous mode has a trap in it that nobody warns you about. The same manual notes that in AI Servo AF, the focus indicator in the viewfinder does not light up when subjects are in focus. You lose the confirmation light you have been relying on, so a beginner using AI Servo for a portrait is shooting without the one piece of feedback that tells them it worked. AI Focus AF, the automatic mode in between, starts in One-Shot and switches itself to AI Servo the moment it detects subject movement or a change in distance, which means the behaviour of your camera changes mid-session without telling you. For a seated or standing portrait, pick the simple one.
If the names are a blur, focus modes and focus areas are two different settings untangles them properly.
What Portrait mode actually does
It is worth knowing, because the honest answer is that it is not a bad place to start and it is a terrible place to stay.
Canon's manual says the Portrait mode blurs the background to make the human subject stand out, and that it also makes skin tones and hair look softer. That second half is processing applied to the file, not an exposure decision, and it is being applied whether you want it or not. The same page notes the mode defaults to low speed continuous drive, so holding the button gives you a burst to pick an expression from.
Its own shooting tips are good advice regardless of mode: put as much distance as you can between your subject and the background, use the telephoto end of your zoom, fill the frame from the waist up, and make sure an AF point is sitting on the face before you shoot.
What the mode will not do is tell you what it chose. You cannot learn from it, you cannot repeat it tomorrow, and you cannot nudge one value when the picture is nearly right. That is the whole case for Aperture Priority instead. The mode dial, one row at a time goes through what each position is actually handing you.
Flash, and the number that stops you
If you add a flash outdoors to fill in shadow under the eyes, there is a hard ceiling you will hit immediately. Nikon lists the D7500 as synchronising at up to 1/250 of a second, and it will still sync at 1/320 or slower with the flash range dropping between those two speeds.
In bright sun at f/2.8 you will want a faster shutter than that, and the camera will simply refuse. The way past it is high speed sync, which Nikon calls Auto FP and lists as working up to 1/8000 with a compatible external flash unit. The built-in pop-up will not do it. That is the real reason outdoor fill flash pushes people toward a hotshoe flash, and it is worth knowing before you buy one for the wrong reason.
Why 'best settings' is the wrong question
Because the list at the top of this page is a starting position, not an answer, and the forum reply you got was trying to say that without giving you anywhere to start.
The light decides. Open shade and overcast are forgiving, which is why the numbers above work. Direct midday sun puts hard shadows in the eye sockets and no aperture fixes it, so you move the person. Indoors by a window, the window is the light and the only setting that matters is which way your subject faces. The settings follow the decision about light, never the other way around.
What the numbers buy you is the ability to stop thinking about the camera for the twenty minutes when someone is willing to be photographed.
One practical thing about the camera on your body

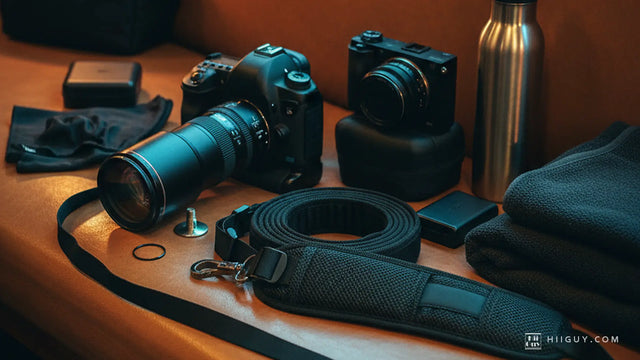
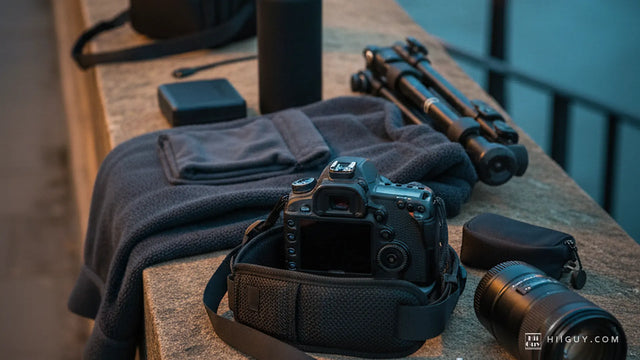
That is one of our own photographs and it shows the posture this whole article assumes: eye to the viewfinder, both hands on the camera, nothing in the way. A neck strap fights that position, because the moment you raise the camera the strap is slack across your throat and the camera is pulling against it.
The HiiGuy strap is worn across the body instead, so the weight sits on one shoulder and the camera comes up to your eye without anything tightening. It is heavy-duty polyester webbing into a wide padded shoulder pad, with a stainless steel quick release at the camera end. Two variations, and length is the only difference between them: the regular adjusts up to 32 in on the body, the XXL adjusts up to 44 in, and both are on the same Amazon listing.
The thirty second setup
Aperture Priority. f/2.8 for one person, f/5.6 for a group. Longest end of the lens you have, then walk backwards. Auto ISO on, ceiling 3200, minimum shutter 1/160. Single point AF, single-shot mode, point on the near eye. Exposure compensation up two thirds of a stop if the face is pale and the background is dark.
Then stop adjusting and start talking to the person, because at that point the camera is no longer the problem.