There is a moment on almost every hike where the camera loses. Somewhere around mile three the swinging gets annoying, the shoulder it hangs on starts to complain, and the camera goes in the pack. From there you photograph nothing. The view at the top is the best one of the day and it stays on the wrong side of a zip.
Search for the best camera strap for hiking and you get a wall of products and almost nothing about what a trail does to a camera. So this is the version we wish existed: the forces involved, the conflict with your backpack, and what to change before the next walk.
Do the weight math before you argue about comfort
People underestimate this every time, because you judge a camera's weight in a shop, held in two hands, for about fifteen seconds.
Take a common beginner setup. Canon's published specification chart for the EOS Rebel T7 gives the body as 16.75 oz including battery and card. Put the telephoto from the double zoom kit on the front and Canon's published specification for the EF 75-300mm f/4-5.6 III adds another 16.8 oz. Add them and you are carrying about 2 lb 2 oz.
Two pounds is nothing in your hands. Two pounds hanging off one point on your body for five hours, bouncing every time your heel lands, is an entirely different measurement. Trail walking is a series of small impacts, and each one asks the strap to catch the camera and hand the shock to whatever part of you it sits on. That is why the neck gives up first and why a narrow band hurts long before a wide one does.
The number also tells you something useful about the lens. The glass on the front is roughly half the load and all of the swing, because it hangs furthest from the mounting point. A body with a small prime is a different hiking problem from a body with a zoom, and pretending otherwise is how people end up blaming the strap for a lens decision.
Your backpack got to your shoulders first
This is the part general carry advice skips, and on a hike it decides everything. A loaded pack already owns both of your shoulders, has a sternum strap across your chest and usually a hip belt at your waist. The camera is arriving fourth to a body that has run out of room.
You have three honest options, and they are not equally good.
Strap over the pack straps
The fastest to set up and the worst to walk in. The camera strap sits on top of the pack's webbing, which means it slides around on a surface that is already moving, and it traps the pack strap underneath so you cannot adjust your pack without taking the camera off. On a steep section it works its way toward your neck.
Strap under one pack strap, across the body
Put the camera strap on first, across your body, and then put the pack on over it. The pack's shoulder strap now holds the camera strap in place instead of fighting it, and the camera rides at your opposite hip where your arm swing clears it. This is the arrangement most people settle on, and the one thing it demands is length. Running a strap under a loaded pack strap and down to the opposite hip needs noticeably more webbing than wearing the same strap around your neck in town, and a strap already at the end of its adjustment will pull the camera up into your armpit for the whole walk.
Camera off your shoulders entirely
Clipped to the hip belt or carried in a chest pouch. Your hips carry weight better than anything else you own, which is the entire reason a pack has a hip belt. The trade is access and bulk: the camera is below your hands rather than in front of them, and something rigid at your waist catches on rock when you scramble.
For walking rather than climbing, the second one is the one we would pick every time. If you want the full comparison away from the hiking context, we wrote it up in seven ways to carry a camera all day.
What makes the best camera strap for hiking different
Four things matter on a trail and the rest is marketing.
- Enough adjustment to clear a pack. Not "adjustable", which every strap claims. Enough range that the camera still reaches your hip with a loaded pack in the way and a jacket on underneath.
- A wide pad, positioned where your pack is not. Padding converts a line of pressure into an area of it. That only helps if the pad can sit somewhere your pack strap is not already sitting, which again comes back to length.
- A release you can work with cold hands. You will take the camera off for a tripod, for a summit photo, for a break. If that takes two minutes and a lost screw, you will stop doing it.
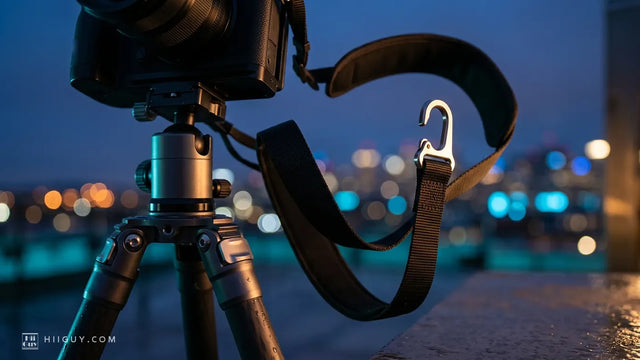
- A second line of defense. Anything carrying a camera over rock should have a backup if the primary attachment lets go.
Before you buy anything, our pre-purchase checklist covers the hardware questions that apply to every strap, hiking or not.
The strap we make, and why it suits a trail

That photograph is the geometry this whole article is about, and it is one of ours, shot on a walk rather than in a studio. The strap crosses the back, the pad sits on one shoulder, and the camera hangs at the opposite hip with the long lens pointing down and the hands free. Put a pack on over that and almost nothing changes.
The HiiGuy camera strap comes in two variations, and length is the only difference between them. The Regular adjusts up to 32 in on the body and the XXL adjusts up to 44 in, which is the range that matters once a pack, a jacket and a taller frame are all competing for the same diagonal. It is heavy-duty polyester webbing with a wide padded shoulder pad, a stainless steel quick release so the body comes off in one movement at a tripod, and a safety tether sitting behind the release. HiiGuy has been making it since 2016 and backs it for three full years.
If you are tall, broad, or wearing a winter layer over everything, start with the XXL. The way crossbody carry goes wrong on a trail is rarely the pad or the hardware. It is a strap that runs out of adjustment two inches before the camera reaches the hip.
Cold, wet and the mistake at the end of the hike
Trails take cameras outside their stated comfort zone, and the manufacturers are specific about where that zone ends. The same Canon specification chart for the Rebel T7 lists a working temperature range of 32 to 104°F and a working humidity range of 85 percent or less. Most winter hiking in the mountains happens below the bottom of that range, which does not mean the camera will fail, but it does mean you are outside what the maker tested.
The bigger risk arrives after the walk. Canon's handling precautions for the EOS R5 put it plainly: if the camera is suddenly brought in from the cold into a warm room, condensation may form on the camera and internal parts. Canon's own fix is to seal the camera in a plastic bag before you go inside and let it come up to temperature in the bag. If condensation has already formed, the manual says not to use the camera or remove the lens, card or battery, and to leave it switched off until the moisture has fully evaporated.
The practical version for a hiker: the freezer bag goes in the pack at the start of the hike, not after you get home. A cold camera going straight into a warm car does the same thing a cold camera going into a warm kitchen does.
The rhythm that actually gets you photographs
None of this matters if the camera stays packed. A few habits change the hit rate more than any gear decision:
- Shoot the climb, not just the summit. The light on the way up is usually better than the light at the top, and you are less tired.
- Settle the strap before you start walking. Set the length with the pack on, once, at the trailhead. Adjusting it mid-trail with cold fingers is how people give up and pack the camera away.
- Put the camera away deliberately. Forty minutes of forest with nothing to photograph is a fine time to have it in the bag. A release that comes off quickly is what makes that a choice rather than a chore.
- One hand on the body for the steep bits. Scrambling with a camera swinging is the moment things hit rock. Hold it against your chest for the twenty seconds that need it.
The short version
Weigh your actual setup and accept the number. Put the strap on before the pack, across your body, with the camera at the opposite hip. Give yourself more length than you think you need, because a pack eats it. Carry a plastic bag for the way home. Then take the camera out on the way up, which is the only part of any of this that produces a photograph.