Here is the situation that sends people looking up camera metering modes. You photograph someone standing in front of a bright window and they come out as a silhouette. You dial in a stop of exposure compensation, shoot again, and now the window is white and the face is still dark. Compensation did not fix it, because compensation was never the problem. The camera is measuring the wrong part of the picture, and the mode that decides which part it measures is sitting in a menu you have never opened.
Four behaviors exist. Every manufacturer has its own names for them, which is most of why the subject feels harder than it is.
What the camera is doing when it meters
It is reading brightness off the scene and deciding how much light to let in so that the result averages out to something reasonable. The disagreement between you and the camera is never about the arithmetic. It is about which pixels get a vote.
Matrix metering gives a vote to the whole frame. Spot gives a vote to a circle smaller than your thumbnail. Everything else is in between. Once you see it that way, choosing a mode is one question: what in this frame actually has to be exposed correctly?
The chart, with each maker's own wording
Four rows, named as the manufacturers name them, so you can check this against the menu on your own body rather than against somebody's generic diagram.
| What it measures | Nikon | Canon | Sony | Use it when |
|---|---|---|---|---|
| The whole frame, weighted intelligently | Matrix | Evaluative | Multi | Almost always. This is the default and it earns it. |
| The middle, with the edges averaged in | Center-weighted | Center-weighted average | Center | One subject filling the middle, busy or uneven background |
| A small circle, nothing else | Spot | Spot, or Partial for a larger circle | Spot: Standard or Spot: Large | Backlit faces, stage light, a subject much brighter or darker than the scene |
| The brightest areas | Highlight-weighted | Not offered | Highlight | Anything spotlit, white dresses, snow, concerts |
Print that, or save it to your phone. The rest of this is what each row does when you actually use it.
Matrix, Evaluative, Multi: leave it here until something breaks
Nikon's own manual describes matrix metering as reading a wide area of the frame and setting exposure according to tone distribution, color, composition and distance, aiming for results close to what the naked eye sees. That is a fair description of what it is for. It is a scene-recognition system, not an average, and on a normal lit subject it is right far more often than you will be.
The honest advice almost no cheat sheet gives: leave it here. Change modes for a specific frame, change it back. Photographers who put the camera in spot and leave it there spend the next year fighting exposures they caused.
One Sony-specific trap worth knowing, from Sony's own help guide: face detection only works in Multi. Set metering to anything else and the camera stops using faces to decide exposure. If your portraits were fine and then suddenly were not, check that first.
Center-weighted: the one that is nearly always the wrong pick
It meters the whole frame but gives the most weight to the middle. On Nikon bodies the size of that favored area is adjustable, through Custom Setting b5, which tells you how little the default matters.
It is a legacy mode and it survives for a legacy reason: it is predictable. Matrix is a black box making judgments, while center-weighted does the same arithmetic every time. If you are shooting a repeated setup and want exposures that match each other frame to frame more than you want each one individually right, this is the mode. Nikon also recommends it with filters that have an exposure factor above 1x.
For everything else, matrix is better at the same job.
Spot: small, powerful, and attached to something you forgot about
This is the mode for your backlit window. The camera reads a tiny area and ignores the rest, so you point it at the face, and the face is correct even if the window blows out completely. Which it will, and that is the right trade.
How small is tiny? Nikon's Z9 manual gives a circle about 0.16 in across, which is roughly 1.5 percent of the frame. Canon publishes figures per body: the manual for its recent mirrorless bodies lists spot at roughly 2.0 percent of the screen in viewfinder shooting and 2.9 percent in Live View, with partial metering as the larger alternative at about 6.5 percent and 5.8 percent. Partial is the one people miss. It is a spot that is forgiving of a slightly shaky aim.
The part that breaks it
Where is the circle? Not necessarily in the middle. Nikon's manual states that the spot is centered on the current focus point, and only falls back to the center point when the camera is in Auto-area AF. Sony puts the circle wherever the separate Spot Metering Point setting says. So two people can both be "in spot metering" and be measuring completely different parts of the same picture.
If you have ever tried spot metering and found it did nothing predictable, this is usually why. Find out whether your spot follows the focus point before you trust it.
If you shoot a Canon Rebel, one row of that chart does not exist
This is the error in every universal metering guide, and it matters because the Rebel is the most common first camera there is.
Canon's specification page for the EOS Rebel T7 lists a 63-zone dual-layer metering sensor with three modes: evaluative, partial at about 10 percent of the viewfinder at center, and center-weighted average. Then a footnote, in as many words: spot metering not provided. There is no highlight-weighted mode either. So on a T7 your small-area tool is partial, and it is a wider circle than spot would have been.
Step up to the T7i and spot reappears at about 3.5 percent with partial at 6.0 percent. Same family, different tools. Check your own body's specification before you plan a technique around a mode it does not have.
Why your exposure compensation was not fixing it
This is the most useful thing in the whole subject and it is buried in a sentence in Canon's manual. In evaluative metering, a half-press of the shutter locks the exposure once the camera has focused in One-Shot AF. In partial, spot and center-weighted average, it does not. Exposure is set at the moment the picture is taken.
Read that again with your window portrait in mind. In evaluative, you can meter off the face, half-press, recompose, and the exposure holds. In spot, half-pressing and recomposing throws your careful measurement away, because the camera remeasures as the shutter fires, by which point the circle is back on the window.
Which means the technique that works in one mode is exactly the technique that fails in the other. Use the AE lock button, not a half-press, whenever you are in spot. That single habit fixes more bad exposures than any amount of compensation. Once it is fixed, the remaining blur is usually a different problem, and we went through it in why your indoor photos come out blurry.
Practising this without losing the camera

Metering is learned by shooting the same scene four ways and looking at the four files, which means an hour of crouching, standing, turning around and taking the camera from your eye a hundred times. That is the hour where a camera gets dropped.
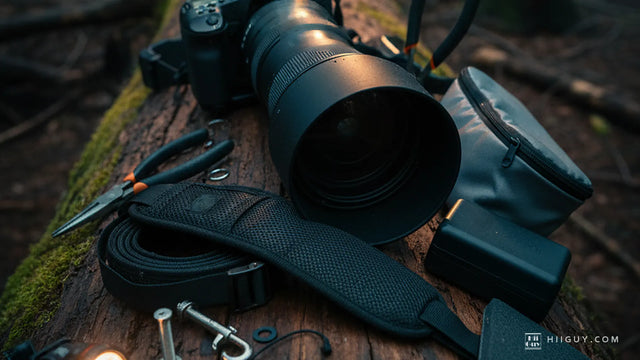
In the frame above the strap is doing the only job that matters during practice: it is out of the way, hanging loose across the chest while both hands are on the camera, and it is still attached. The HiiGuy strap is heavy-duty polyester webbing with a wide padded shoulder pad, a stainless steel quick release and a safety tether as a second path for the load, which is the part that earns its place on a day of fiddling with menus. Two variations, and length is the only difference between them: the Regular adjusts up to 32 inches on the body, the XXL up to 44 inches. See it on Amazon.
What to actually set, today
Put the camera in matrix, evaluative or multi and leave it there. Find your AE lock button and learn where it is with your thumb. Then find out two things about your own body: whether it has spot metering at all, and whether the spot follows your focus point.
Reach for spot or partial when one small thing in the frame has to be right and the rest can go. Reach for highlight-weighted, if you have it, whenever a light source is pointed at your subject. Everything else is the default, doing its job.
Metering is one row of a bigger sheet. The letters on the dial above it are in the mode dial, one row at a time, and the full by-scenario version lives in camera settings by scenario.