Day one of a trip, the camera is weightless. You are out of the hotel at seven, you shoot three hundred frames, you barely notice the thing hanging off you. Day two is fine. Day three you catch yourself shifting it from one shoulder to the other every few blocks. By day four the camera is on the bed, and you are walking around a city you flew to with a phone in your hand, telling yourself you will go back out later with it.
Nobody packs for that. A camera travel strap is the one piece of kit that gets zero thought before a trip, because on any single day it genuinely is not a problem. Carry fatigue does not work by the day. It accumulates, and it arrives on a schedule that no amount of enthusiasm at the airport can argue with.

What is actually hanging on you, in ounces
This is worth doing honestly, because the number is always higher than people guess and it is the only part of the problem you can measure.
Nikon publishes an approximate weight of 22.6 oz for the D7500 body and 14.7 oz for the D5600. Nikon's own specification page prints those figures without stating whether a battery and card are in them, so treat both as a floor rather than a final answer. Now add glass. The AF-S DX 18-55mm VR II is listed at 6.9 oz. The AF-S DX 18-300mm, the one-lens-does-everything zoom that a lot of people buy precisely because they are going travelling, is listed at 19.4 oz.
So the same body leaves the house at roughly 29 oz with the small zoom, and roughly 42 oz with the superzoom. That is the difference between about a pound and three quarters and about two and a half pounds, hanging from one strip of webbing, for eight hours, six days running. The lens you chose to simplify your packing is the lens that nearly doubled the load.
Two and a half pounds is not heavy. That is exactly why this sneaks up on people. Nothing about it hurts on day one.
Why a camera travel strap is a different problem from a camera strap
At home you carry the camera for a couple of hours and put it down. On a trip you are wearing it from breakfast until the light goes, and three other things are happening at the same time that never happen at home.
You are wearing a daypack, so there is already a strap on at least one shoulder. You are changing clothes by altitude and hour, so the strap that sat right over a t-shirt at noon is strangling you over a fleece at six. And you are walking much further than you do on an ordinary day, which turns a mild rub into a hot spot.
None of those three is about the strap being good or bad. They are about the strap being set up for one day and asked to do six.
Nobody searches for this before the trip
We can see the shape of it in our own Amazon advertising data. The search term report for the period ending August 2026 contains 620 distinct phrases that real people typed before clicking an ad of ours. Exactly one of them is "camera travel strap", and it drew a single impression.
Meanwhile "best camera strap for hiking" drew 735 impressions on its own. Not one phrase in the entire 620 contains "all day". Not one mentions neck pain or shoulder pain. Not one contains "lightweight".
Read that honestly and it says something slightly uncomfortable. People do not shop for this problem in advance, because in advance the problem does not exist yet. They shop by activity, and hiking is the one activity where the discomfort is expected, so it is the one that gets searched. The city trip, where you will actually walk further and carry longer, has no search term at all.
Four things to change before you go, not after
1. Set the length at home, wearing what you will actually wear
The adjustment you make in a hotel room on day two is a compromise made standing in front of a mirror with a sore shoulder. Make it properly at home instead, over the jacket you are taking, not over the t-shirt you are sitting in. If the trip spans real temperature changes, know which setting is the coat setting before you leave. We worked the drop out by height and by carry position in our camera strap length chart.
2. Decide where the camera parks when you are not shooting
Hanging at the front means it swings into railings, counters and other people, and it means you brace it with a hand all day without noticing. Parked behind the hip, it does none of that. The cost is half a second to bring it up. On a six-day trip that trade is not close.
3. Work out the daypack order before day one
Camera strap over the pack strap or under it is a decision you only get to make once each morning, and most people make it by accident. Under the pack strap pins the webbing and stops it sliding, but it also means taking the pack off to get the camera free. Over the top keeps the camera independent and puts both loads on the same shoulder. We went through both arrangements, and when each one is right, in wearing a camera strap with a backpack on.
4. Swap shoulders deliberately, on a schedule
Most people switch sides when the first shoulder starts complaining, which is already too late. Switch at lunch whether it hurts or not. This is the cheapest thing on the list and the one nobody does.
The things a strap has to survive on a trip
Travel is harder on hardware than a weekend at home, in a dull way rather than a dramatic one. The camera goes in and out of a bag at security. It gets set down on café tables and picked up by the lens. It spends a week being sat on in taxis.
Two things matter more than they do at home. A quick release lets you take the body off the strap for a flight, or to mount it on a tripod, without unthreading anything. And a safety tether is the part that only ever matters once, which is the whole argument for having one. If you want the detail on why that second strand exists, we pulled the mechanism apart in what a safety tether is for.
The rest of what goes in the bag, we itemised separately in what actually goes in a travel camera bag.
Which HiiGuy strap to take
We have been making this strap in Los Angeles since 2016, so here is the straight answer rather than a brochure one.
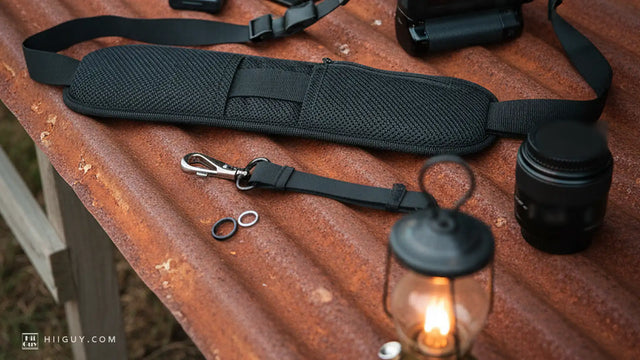
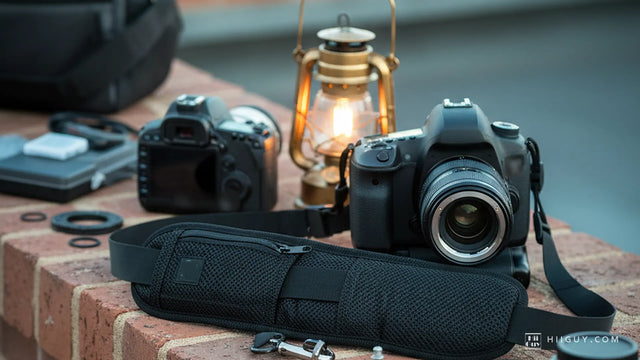
The HiiGuy strap comes in two variations and the only difference between them is how far they adjust. The Regular adjusts up to 32 in on the body. The XXL adjusts up to 44 in. Everything else is identical: the same heavy-duty polyester webbing, the same wide padded shoulder pad, the same stainless steel quick release, the same safety tether, and the same HiiGuy 3 year warranty.
For a trip, pick by how you will be dressed at the coldest point, not the warmest. A strap that is at the end of its adjustment over a t-shirt has nowhere left to go when the fleece comes out, and that is the day you end up carrying the camera in your hand. If you are tall or broad, or you are travelling somewhere you will be wearing layers, the XXL is the one that leaves you room.
If you would rather see the whole specification before deciding, it is on the HiiGuy camera strap product page, and you can check it on Amazon.
The test that tells you before you fly
Put the camera on with the lens you are taking, with the daypack you are taking, wearing the jacket you are taking. Walk for an hour. Not around the house. An actual hour, outdoors, on the pavement.
If you finish that hour having adjusted nothing and thought about it once, the setup is ready for six days. If you spent the hour fiddling, you have just learned on a Tuesday at home what you were otherwise going to learn on day four of a trip you paid for. That is the entire point of doing it early.
The strap is not what the trip is about. It is just the thing that decides whether the camera is on your shoulder on day four or on the bed.