Most lists of photography essentials for beginners are shopping lists. Filter kits, flashes, a bag with eleven compartments, a second lens before you have worn out the first one. Here is the honest version: four of the five things below are small, and the one real spend is a lens that changes what your pictures look like rather than what your bag looks like.
The test we used for every item: in the first month with a new camera, does the absence of this thing stop you taking a photograph you wanted? If the answer is no, it went in the list at the bottom instead.
Some of the links below are affiliate links and we earn a small commission if you buy through them. It costs you nothing extra and it does not change what we recommend. The HiiGuy strap is our own product, not an affiliate link.
1. A second battery, and it is the cheapest insurance you will ever buy
This is first because it is the thing that most often ends a day early, and nobody warns you.
The shot counts on the box come from the CIPA standard, which measures stills taken through the viewfinder with the screen off. Real shooting is not that. Every minute in live view, every clip of video, every time you zoom into a frame to check focus, every cold morning: all of it pulls the real number down below the printed one. Mirrorless bodies are rated with an electronic viewfinder or the rear screen running the whole time, which is why their published figures start lower than a DSLR's in the first place.
Buying the right one is easy and people get it wrong anyway. Take the battery out of your camera and read the code printed on it. Canon's entry bodies use the LP-E10 or the LP-E17, Nikon's use the EN-EL14a or the EN-EL15c, Sony's use the NP-FW50 or the NP-FZ100. Match that code exactly. A battery that is nearly the right shape is a battery that will not sit on the contacts.
One habit worth starting now: charge both, keep the spare in the same pocket every time, and put it in facing the same way so you can tell the full one from the flat one without looking.
2. One memory card you trust, rather than four you do not
Four cheap cards means four chances of a card failing and one unlucky day where it is the one with the good frames on it. Buy a single card with a name on it, put everything on it, and copy it off at night.
A SanDisk Extreme 128GB SDXC card is rated at 180 MB/s read and 90 MB/s write. No entry-level camera comes close to asking that of a card, and that is exactly the point: the card is never the thing that fills up, slows down, or drops a file halfway through writing it. You are buying headroom and a warranty, not speed.
Two things worth knowing before you spend more. A UHS-II card will work in a camera that only speaks UHS-I, at UHS-I speed, and you will have paid for pins the body cannot use. And the number on the front in megabytes per second is the read speed, which is how fast photos come off the card onto your laptop, not how fast they go onto it. The write speed is the one that matters while you are shooting, and it is always the smaller of the two.
See the SanDisk Extreme SDXC on Amazon
3. A strap you can wear across your body

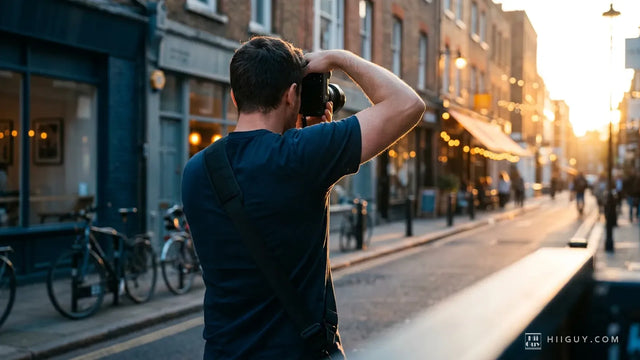
The strap in the box is a neck strap with the camera maker's name printed on it, and it does two unhelpful things. It hangs the full weight of the body and lens on the two tendons at the back of your neck, and it is sized as though everybody is the same build. By the third hour you are carrying the camera in your hand instead, and a camera in your hand is a camera you put down.
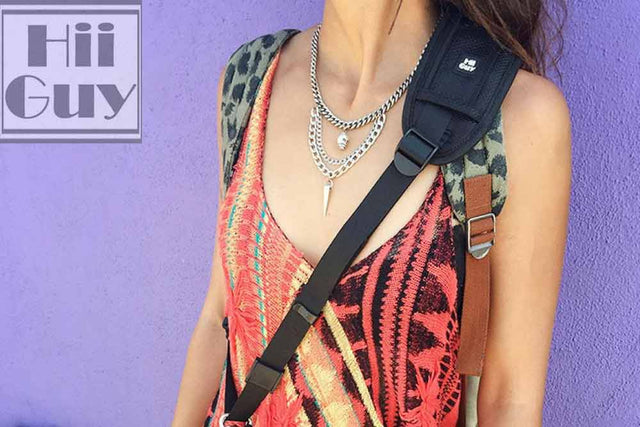
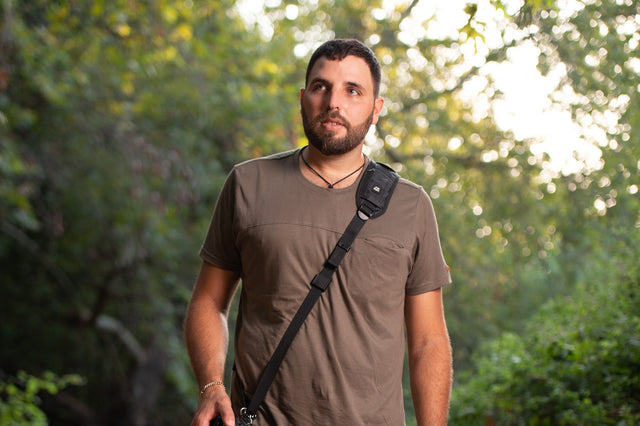
The HiiGuy camera strap is worn across the body instead, so the load goes onto one shoulder and your back, and the camera sits down at your hip where your arm naturally rests over it. It is heavy-duty polyester webbing into a wide padded shoulder pad, with a stainless steel quick release at the camera end so the body comes off in one movement when it goes on a tripod, rustproof metal fittings, and a safety tether sitting behind the release as a second route for the load. HiiGuy has been making it since 2016 and backs the HiiGuy strap for three full years.
It comes in two variations and length is the only difference between them: the Regular adjusts up to 32 inches on the body and the XXL adjusts up to 44 inches. If you are broad through the chest, if you shoot in a coat half the year, or if you want a long lens to hang clear of your hip, take the XXL. We put the numbers in a camera strap length chart if you want to work it out properly before you choose, and there is a longer piece on seven ways to carry a camera all day if you have not settled on how you like to carry yet.
4. A rocket blower, and nothing else for cleaning
You will get dust on the sensor and you will get fingerprints on the lens, usually in the first two weeks. Almost everybody reaches for their t-shirt. A t-shirt is a cloth full of the grit you have been walking around in all day, and dragging it across coated glass is how a lens picks up fine scratches.
The Giottos AA1900 Rocket Air Blaster is the large one, about 7.5 inches long and 2.4 inches across, silicone rubber, holding roughly 13.5 fluid ounces of air per squeeze. Two details make it worth having over the tiny bulb blowers sold in cleaning kits. There is a one-way valve in the base, so it draws clean air in through the bottom rather than sucking the dust it just blew off back in through the nozzle. And the nozzle comes off, so you can clean the thing that is supposed to be cleaning your camera.
Air first, always. Most of what is on a lens or a sensor is loose and blows off. What is left after that is the only thing worth touching with a cloth, and by then it is a small enough job to do carefully.
See the Giottos Rocket Air Blaster on Amazon
5. A fast 50mm prime, when you are ready for the one real spend
The kit zoom that came with your camera is probably an 18-55mm at f/3.5 to f/5.6. That f/5.6 at the long end is why your indoor pictures are dark, blurry, or grainy, and no setting fixes a lens that is not letting enough light through.
A 50mm f/1.8 lets through roughly two and a half stops more light at its widest than that kit zoom does at 55mm. Canon's EF 50mm f/1.8 STM weighs 5.6 ounces, focuses down to 1.15 feet and uses a seven-blade rounded aperture. Nikon's AF-S 50mm f/1.8G weighs 6.6 ounces, focuses down to about 1.5 feet, and also runs seven blades. Rounded blades are what make the out-of-focus highlights behind your subject look like circles instead of heptagons, which is most of what people mean when they talk about a lens having nice bokeh.
Know what you are getting before you order, because this one surprises people. On an APS-C body, a 50mm frames like an 80mm would on full frame, which is a portrait length and not a walk-around one. Indoors you will be backing into furniture. If you mostly photograph people, that is exactly what you want. If you mostly photograph rooms, streets and your own kitchen, the equivalent 35mm or the cheapest wide prime your maker sells is the better first prime. We went through the three settings that cause most of this in why your indoor photos come out blurry, and it is worth reading before you decide the lens is the problem.
See the Canon EF 50mm f/1.8 STM on Amazon
What to leave alone for now
Everything here gets recommended to beginners constantly. None of it belongs in month one.
A filter kit. The multi-filter sets sold alongside beginner cameras are mostly effects you can apply afterwards for free, in front of the one piece of glass you own. A circular polarizer is the honest exception because it cuts reflected glare and software cannot, but buy it on its own when you know your filter thread size, not as part of a bundle.
A UV filter "to protect the lens". It protects the front element from a scratch it was unlikely to get and adds two air-to-glass surfaces for flare to bounce around in. The lens cap and the hood already do the job.
A tripod. Unpopular, but true for most people in the first month. A tripod gets used for about four photographs and then lives in a cupboard, because the kind of shooting that needs one is a decision you have not made yet. Learn to hold the camera still and to pick a shutter speed first. Buy the tripod when a specific picture you want is impossible without it, and buy one tall enough to use standing up.
An external flash. A speedlight is a genuinely large subject, not an accessory. Bought early it sits on the hot shoe pointed straight forward, which looks worse than the available light you were trying to escape.
If you only do one of these
Buy the spare battery today, because it is the smallest amount of money on this page and the only one that prevents a day being cut short.
Then the strap, before the lens. That order looks wrong until you notice what actually limits a beginner, which is not image quality, it is how many days the camera comes out of the house. Our piece on the four things you need to get started in photography makes the same argument from the other direction.
The lens is the one to save for. Give it a month, see what you keep photographing, and buy the focal length that matches what you found out rather than the one that was on offer.